Hotmail login
Hotmail is an free e-mail service provided to Internet users by the giant Microsoft. A hotmail account gives you access to Microsoft products like Skype, OneNote, OneDrive, MSN and much more.
To log in to Hotmail, you need to get a Microsoft account. If you are a new user of this service, you can follow the steps below to log in to your Hotmail account.
Hotmail login for Windows
In your Web browser, go to www.hotmail.com. Your browser automatically redirects to hotmail sign in page, which is the screen you use to sign in to all of Microsoft’s applications.
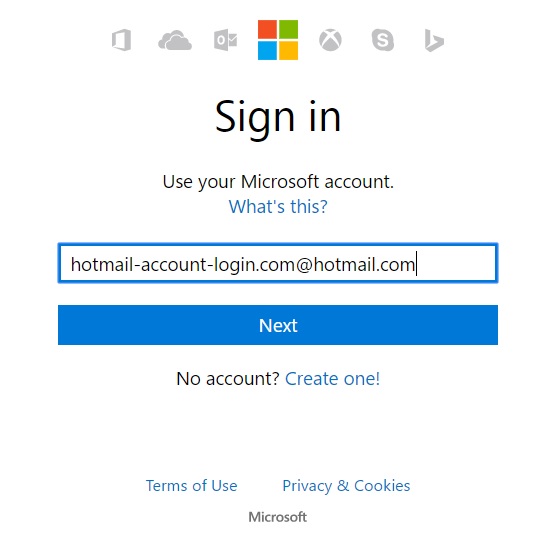
Type in your Hotmail account name. It should end with “@hotmail.com”. Or you may type Your Phone or Skype name. Click “Next“.

Type your Hotmail password in the password box and click on “Sign in“. You will now be logged into your Hotmail account.
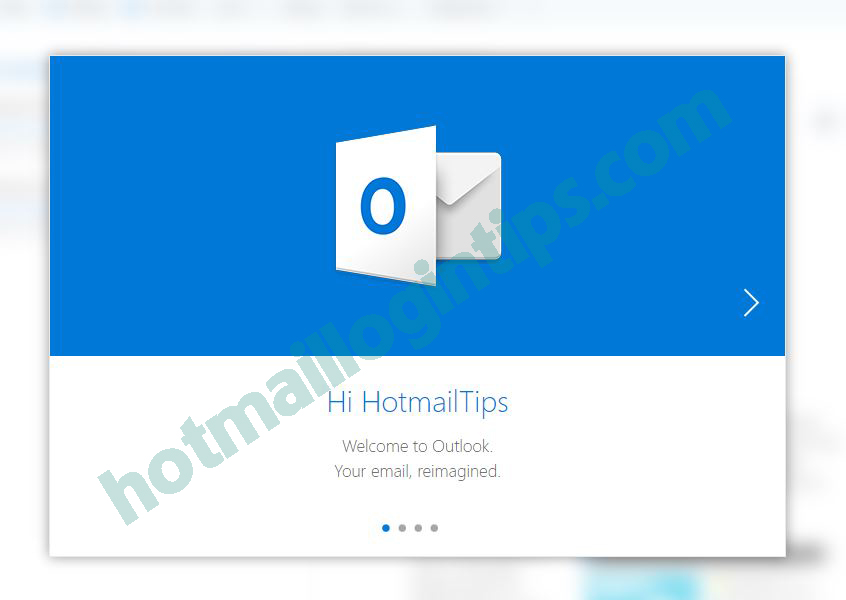
This is a notifications successfully login. Thanks.
Hotmail login for Android ( Hotmail App )
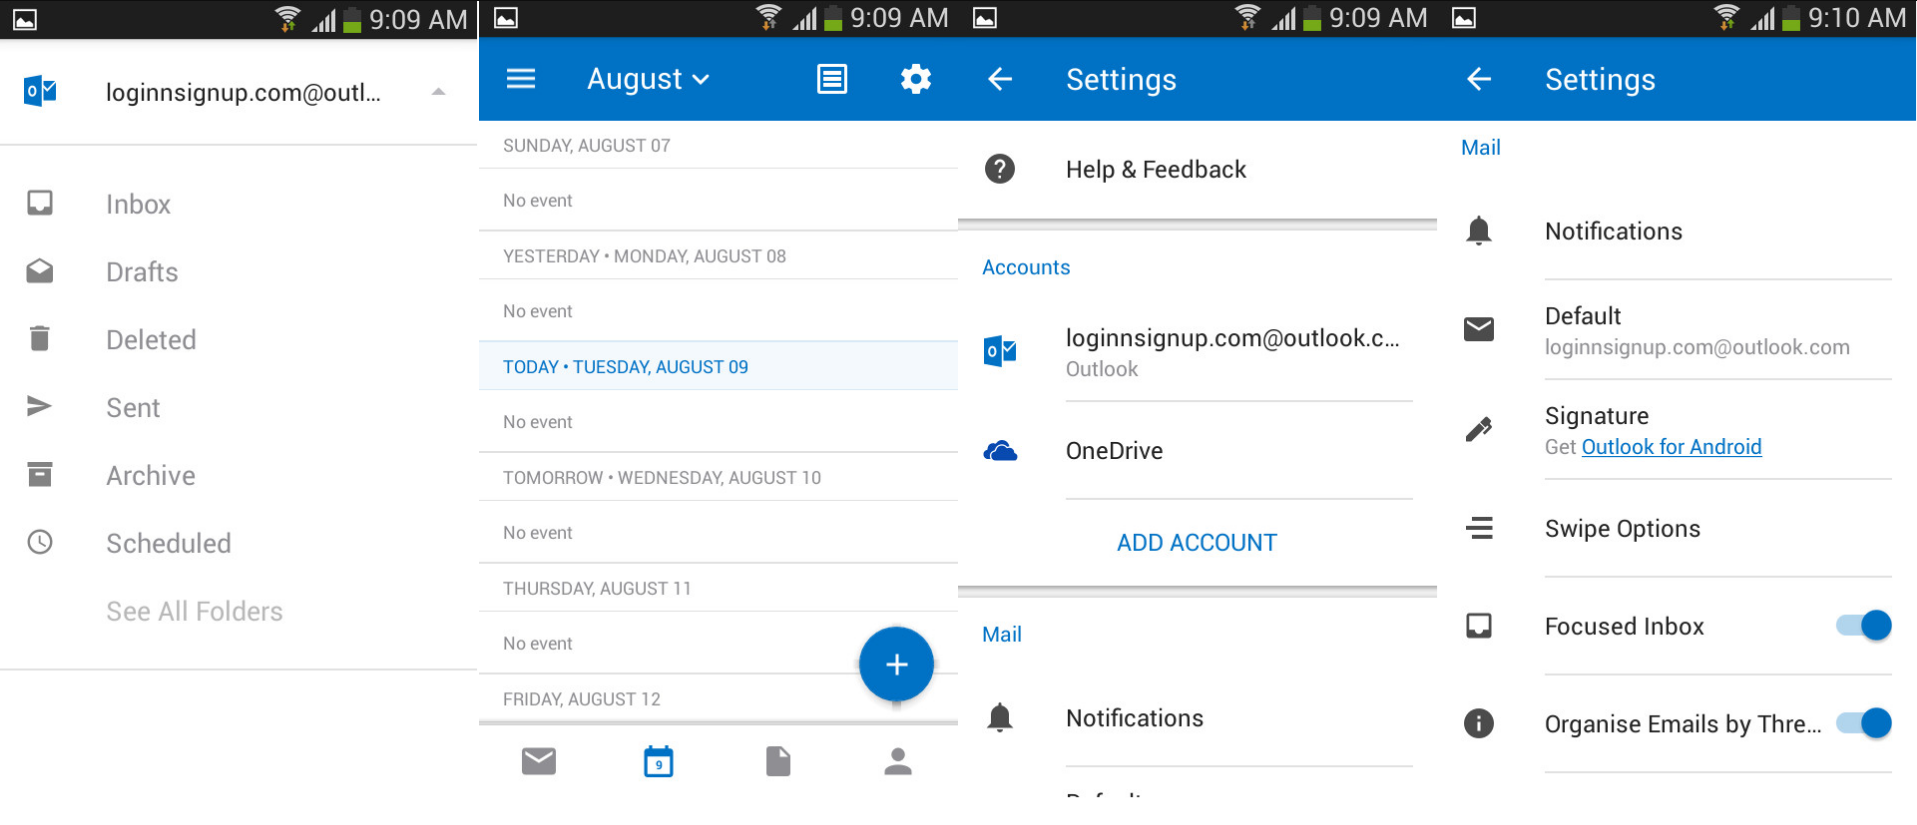
Make sure that your device already installed Hotmail App. If not, you can download it for free from Google Play. The app’s name is currently: Microsoft Outlook. Microsoft’s app is a really useful and commanding email tool. You can manage your emails and attachments easily and access contact lists and calendars with a single swipe of your digits. It might not support all email providers but could works well with Exchange, Outlook.com, Yahoo Mail, Gmail, iCloud, and Office 365 email accounts.
STEP 1: Launch it and you’ll be prompted to enter your email address and password.
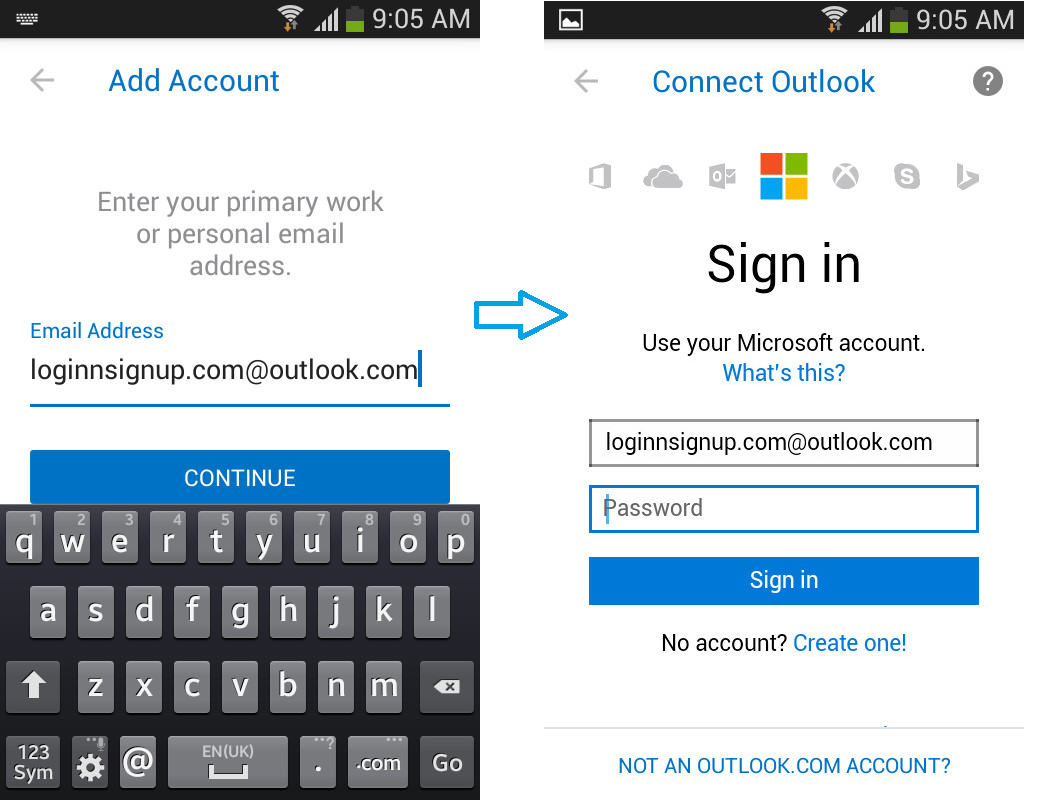
STEP 2: After configuring a few synchronization settings, you’ll see your inbox. The official Hotmail app

Features
- Manage your emails and attachments easily
- Synchronization of contacts, calendar, and events: You could access contact lists and calendars with a single swipe of your digits.
- Multiple account supports: You can configure several Outlook.com or Hotmail addresses.
- Push email: If you daily receive a plethora of emails, the app will analyze your ongoing communication to bring the most important conversations to the top.
Built-In Email App
STEP 1: Open your built-in email client
Tap Settings > Accounts > Add account > Exchange.
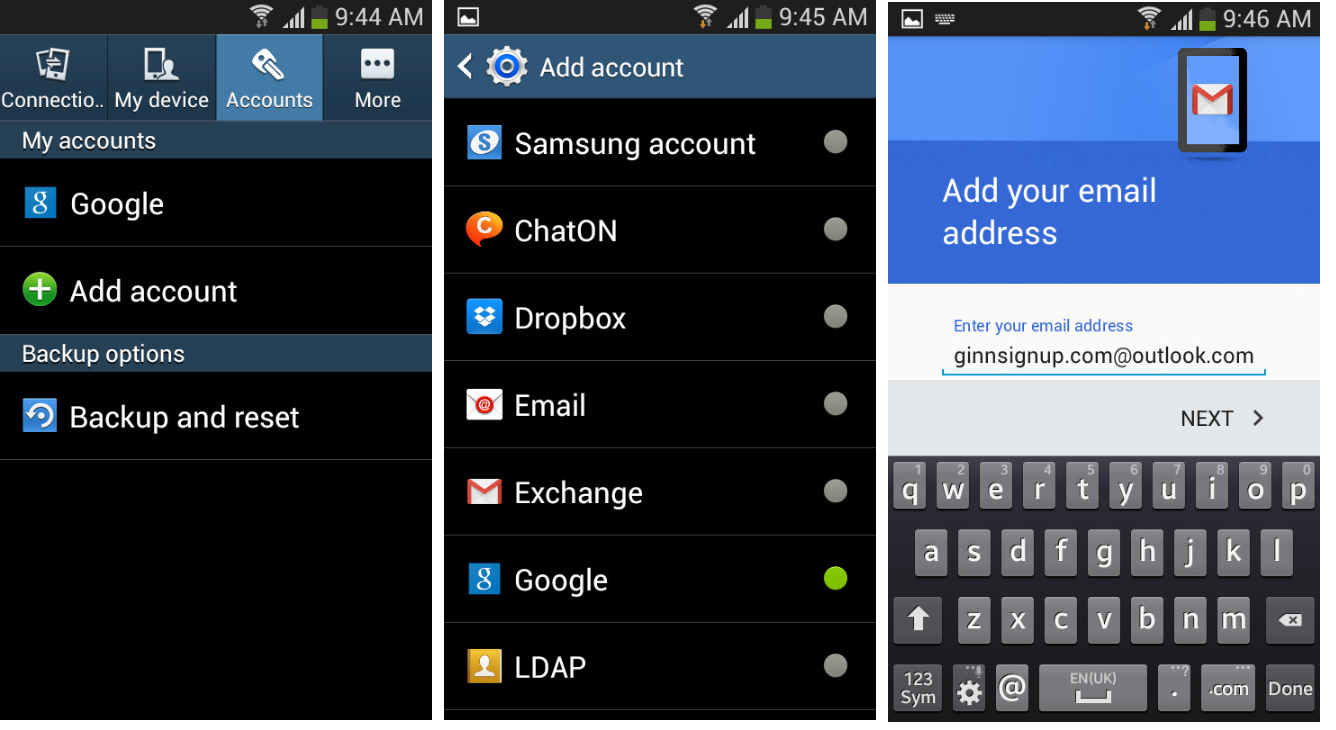
STEP 2: Enter your Hotmail username and password.
Notice: Type your full email address for example hotmaillonline.com@outlook.com (or @hotmail.com,@msn.com,@live.com ,@outlook.co.uk)
STEP 3: If you want to setup your company email on built-in app, you need to know the following:
- Email and Password
- Incoming and outgoing Server
- Server name : s.outlook.com
- Port : 443 or 993
- Security Type : Select SSL/TLS or Use secure connection (SSL).
STEP 4: Account options
Change default sync setting if you want.
After configuring your synchronization settings, you have completed the settings and your account is ready to be used. You can view your email by launching the Email app.
Outlook mail on iPhone, iPad, or iPod
– Outlook for iOS allows you to send and receive emails, view and manage your calendar, and more.
– Outlook for iOS availability may depend on which country you’re currently living for and requires iOS 8.0 or higher.
– Try adding your email account using built-in email app on iOS if your device is not compatible or not available in your region
This tutorial shows you how to do this on an iPhone, but the steps are identical on iPad.
Features :
- A better file management system.
- Fast notifications with a good sound.
- Performing real fast than before.
- Providing better bulk mail management than other email providers.
- Faster syncs than before.
- An awesome view for iPhone.
Built-in email app on iOS
STEP 1: Go to Settings > Mail, Contacts, Calendars > Add Account
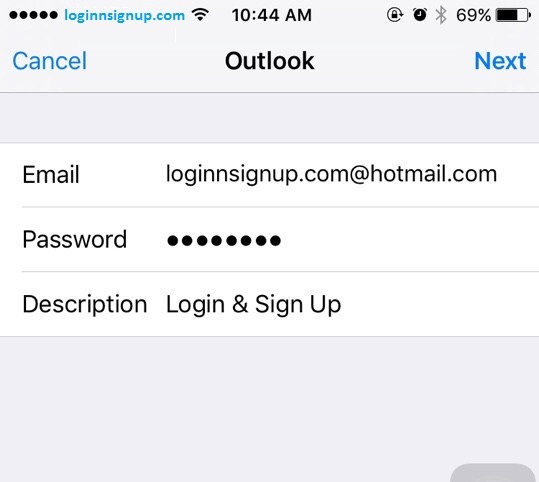
STEP 2: Select “Outlook.com“. The setting procedure is similar to that of Hotmail, Live, or MSN email account.
STEP 3: Enter your Hotmail email address, password and account’s description.
Be careful that you have to enter your full email address, whose ending is either one of these following @outlook.com,@hotmail.com, @msn.com, or @live.com, or @outlook.co.uk, etc,.
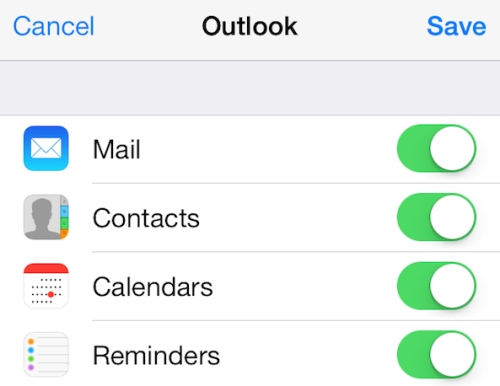
STEP 4: Select what data if you want to sync with Hotmail (your email, contacts, calendars, and reminders). And tap “Save”
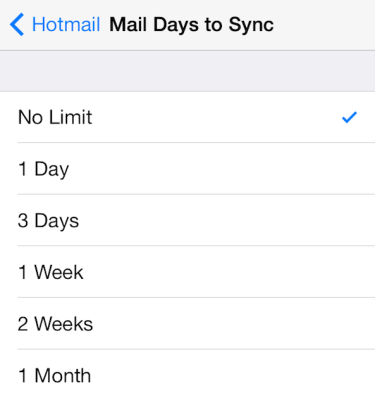
STEP 5: Change “Mail Days to Sync” setting (Default : 1 Week). If you want to have access to all of your emails, choose No Limit.
After you’re signed in, follow any additional prompts and begin using your Outlook for iOS app.
Outlook for iOS
STEP 1: Install Outlook for iOS app from Apple Store.
STEP 2: Launch app and enter your full email address. And tab “Add Account”.
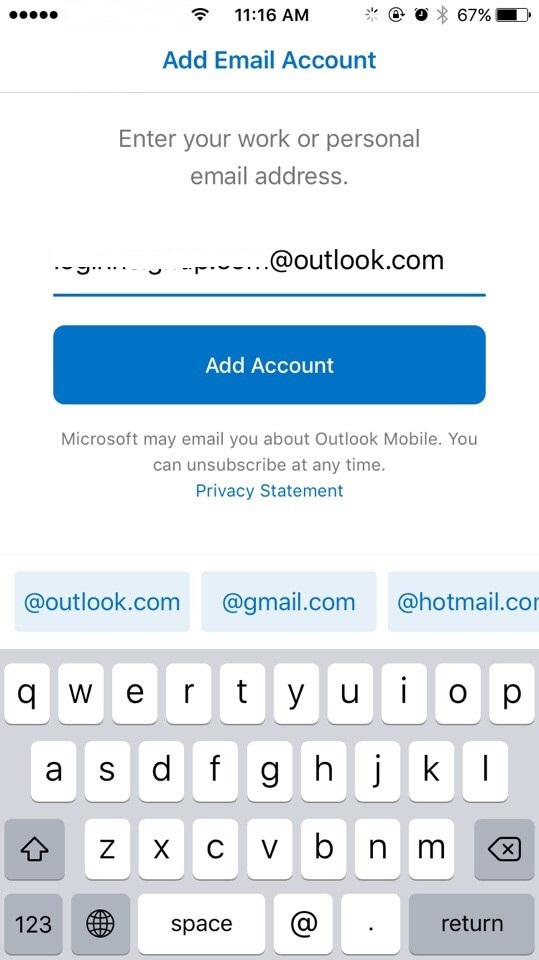
STEP 3: Enter your login credentials and tap “Sign in“.
After configuring your synchronization settings, you account is ready for use. You can view your email by launching the Email app.